
Choosing the right thermal printer mechanism affects print quality, reliability, and the space required inside a product. A compact receipt printer, for example, may need a narrow paper path and a mechanism that fits behind a small front panel. A kiosk used throughout the day has different demands. Its mechanism must handle frequent printing without becoming difficult to service. Small details matter.
This guide introduces two practical tips for evaluating a thermal printer mechanism: match its specifications to the intended use, and check how easily it can be integrated and maintained. Compare supported paper width, print speed, resolution, power requirements, and expected duty cycle against real operating conditions. A fast mechanism is not automatically the best choice if it creates excess heat or uses more power than the device can provide. Check mounting points, cable access, and paper loading, too. These details are easy to overlook on a specification sheet.
Product data can narrow the options, but testing with the actual paper, enclosure, and print content provides stronger evidence. Ask suppliers for current datasheets and clarify any limits that are unclear. I would not assume that two mechanisms with similar dimensions behave the same in a finished product. That assumption can be costly. The sections that follow explain what to compare and which questions to ask, helping engineers and buyers make a more informed choice without treating any single specification as a guarantee.
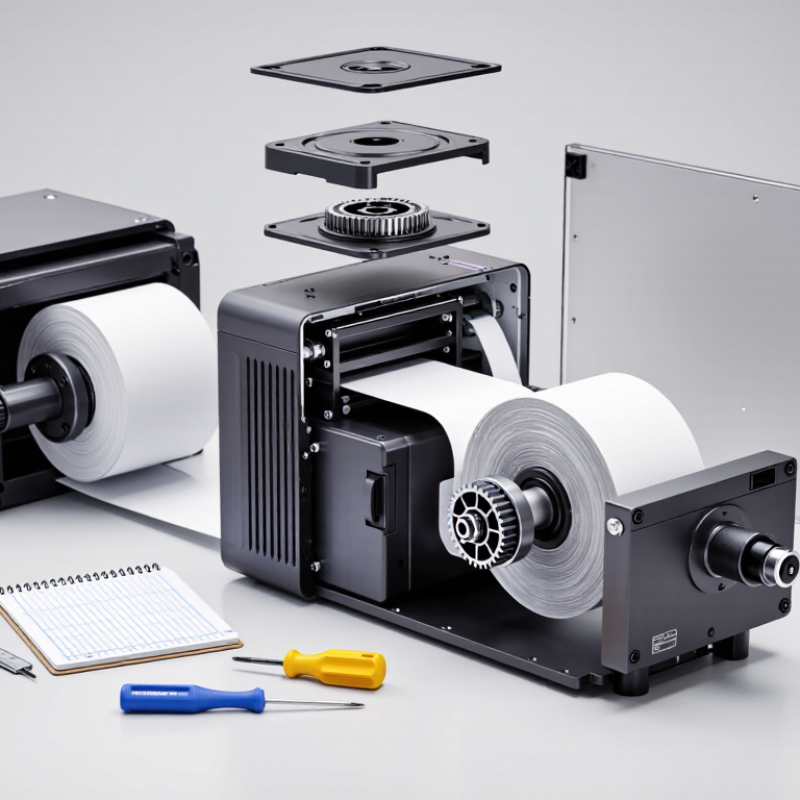
Thermal printer mechanisms generally fall into two types: direct thermal and thermal transfer. In direct thermal printing, a heated printhead darkens a treated paper surface. There is no ink ribbon to replace, which keeps the mechanism simple and reduces routine supplies. It suits short-lived labels and receipts, but heat, sunlight, and friction can fade the image. Paper matters.
Thermal transfer mechanisms use heat to move ink from a ribbon onto a label or other compatible material. This can produce longer-lasting marks on a wider range of media, though the ribbon and substrate must work together. A mismatch may cause smudging or weak print. Not always obvious.
When comparing mechanisms, look beyond headline speed. Check print width, resolution, expected daily volume, sensor options, and how the unit fits into the device. A compact mechanism may save space, but cramped media paths can make loading and maintenance harder. This is easy to underestimate. Choose direct thermal for simpler, short-term output; consider thermal transfer when durability or material flexibility matters. Test the actual media in realistic conditions before settling on either type.
Thermal Printer Mechanisms and Their Main Types
Compare the two common mechanisms by the media and consumables they require. In the chart, 1 means “Yes” and 0 means “No.”
Tip 1: Check your label stock. Direct thermal printing requires heat-sensitive media; thermal transfer printing uses a ribbon and compatible media.
Tip 2: Consider how long labels need to remain legible and the conditions they will face. Choose a compatible mechanism, ribbon, and media combination for the application.
A thermal mechanism should be matched to the label, not chosen by resolution alone. Direct thermal printing suits short-lived labels, while thermal transfer supports longer-lasting marks on varied media. The Smithers report The Future of Thermal Printing to 2028 forecasts continued growth in thermal printing, reflecting its broad use in logistics and retail. But market growth does not tell you which printhead fits your application. Test the actual stock, ribbon, and print speed together.
Tip 1: Define the smallest detail you need to reproduce. Fine text and dense barcodes may need higher resolution, but correct darkness and speed matter too. GS1 barcode specifications use a 0–4 quality scale, with minimum grades depending on the application. Verify samples with a barcode verifier; a crisp-looking label can still scan poorly.
Tip 2: Match the mechanism to the media’s surface and working conditions. Try labels from the intended roll, including its coating, adhesive, and liner. Check a sample after exposure to expected heat, rubbing, or moisture. A data sheet helps, but it cannot replace a real test. This step is easy to rush, and that is where selection can go wrong.
Comparing Speed, Resolution, and Paper Width
A mechanism’s headline speed can look impressive, but it may change at higher print resolutions. Check the rated speed at the resolution your labels or receipts actually require. Then test a sample with small text, barcodes, and the paper you plan to use. Look for smudging, faint edges, or missed lines. Real samples matter.
Tip 1: Match speed to print quality. A fast mechanism may suit simple receipts, while dense graphics or small codes may need sharper output. Compare speed and resolution together, not as separate numbers. If possible, run a continuous test; a few clean prints do not reveal heat buildup or inconsistent feeding. This part is easy to overlook.
Tip 2: Confirm paper width and usable print area. A mechanism may accept a certain roll width, yet its printable width can be narrower because of margins or guides. Measure your media, including any backing or edge gaps, and check that the printhead and paper path support it. Leave room for tolerances. I would still verify with the exact roll, since supplier dimensions can vary slightly.
A thermal printer mechanism may look sturdy on a bench, yet fail early under heat, dust, or constant use. Check its rated duty cycle against the real workload, not an occasional peak. If labels print for hours, ask how it handles sustained heat and repeated paper feeding. That matters. Inspect wear points such as the platen roller, gears, and paper guides; uneven pressure can cause pale bands or frequent jams. A sample run with your actual media may reveal issues that a specification sheet misses.
Operating conditions shape service life. Measure the temperature near the printer, especially inside enclosed kiosks or factory cabinets. Dust and paper fibers can collect around moving parts, while vibration may loosen mounts or affect alignment. Choose a mechanism suited to the environment, and confirm cleaning intervals in its technical documentation. Keep airflow clear. Consider service access, too: hard-to-reach parts may stay dirty longer than intended. I would not judge durability by metal construction alone; tolerances, lubrication, and media quality matter as well. Real installations are messy, and test conditions rarely capture every surprise.
| Tip | Evaluation dimension | What to check | How to use it when selecting |
|---|---|---|---|
| 1. Assess durability | Printhead life | Check the rated print distance and the test conditions behind it. Thermal-head life ratings are often stated in kilometres, but vary substantially with print energy, media, pressure, speed, and cleaning. | Compare ratings only when the test conditions are similar. Ask whether the printhead is replaceable and what replacement involves. |
| Cutter life, if fitted | Look for a cutter life rating in cuts and confirm that it applies to the intended paper thickness and cut type. Adhesive labels and unsuitable media can increase wear or cause jams. | For frequent cutting, prioritize a mechanism with a documented cutter rating and accessible cleaning or replacement procedures. | |
| Duty cycle and workload | Confirm the supported print speed and recommended workload for continuous or intermittent use. Peak speed alone does not establish suitability for sustained printing. | Match the mechanism to expected print volume, label length, and operating hours; allow capacity for workload peaks. | |
| Media and maintenance | Verify media width, thickness, coating, and roll or label format. Paper dust and residue can affect print quality and accelerate wear; cleaning frequency depends on media and usage. | Use media within the mechanism’s stated limits and include routine printhead and platen cleaning in the maintenance plan. | |
| 2. Check operating conditions | Operating temperature | Many mechanisms specify an operating range around 0–50°C, but the permitted range is model-dependent. High temperatures can affect components and print quality; low temperatures can change media and mechanism performance. | Check the exact product specification against the equipment’s real ambient temperature, including heat from nearby electronics or enclosed cabinets. |
| Humidity and condensation | Some models specify a non-condensing operating humidity range such as 20–80% RH. The allowable range varies, and condensation should be avoided. | For humid or rapidly changing environments, confirm the stated humidity limits and provide appropriate enclosure or environmental control. | |
| Dust, debris, and vibration | Paper dust can collect around the printhead and sensors. Vibration or shock may affect media tracking and print alignment; protection levels and test ratings differ by mechanism. | For exposed installations, check the mechanism’s environmental and vibration specifications and plan for shielding and regular inspection. | |
| Installation and heat dissipation | A confined enclosure can restrict airflow and raise operating temperature. Mounting orientation, cable routing, and access for media loading can also affect reliable operation. | Check the installation drawings and clearance requirements, then validate the mechanism in the finished enclosure under realistic workload. |
Note: Operating limits and life ratings are specific to each mechanism. Confirm the manufacturer’s current datasheet and test conditions before making a final selection.
Check integration before comparing prices. Confirm the mechanism’s paper width, mounting points, feed direction, and connector layout match your enclosure. A small mismatch can force a costly redesign. Verify that the drive electronics support the required voltage, current, and print speed, especially during startup. Leave room for the paper roll and a clear path for loading labels. That matters. A short bench test with your actual paper can reveal skew, jams, or uneven printing before production. Test more than one roll; paper thickness can vary.
Maintenance affects both uptime and total cost. Check whether the printhead and platen roller are easy to reach without dismantling the device. Ask how often routine cleaning is recommended, and whether replacement parts are readily available. Then estimate costs over the expected service life: mechanism price, paper, maintenance labor, spare parts, and downtime. Cheap upfront can become expensive. Your estimate will still be imperfect, because usage and service conditions change. Record a realistic print volume and test the mechanism under that workload. A little extra time here helps make the comparison fair.
Direct thermal printing darkens treated paper with a heated printhead. Thermal transfer printing uses heat to move ink from a ribbon onto compatible material.
It suits short-lived labels and receipts. There is no ribbon to replace, so routine supplies are simpler. Heat and sunlight can fade the print.
It transfers ink from a ribbon to a label or other compatible material. The print can last longer, but the ribbon and material must work together.
Consider how long the print must last and which materials you need. Direct thermal is simpler for temporary output; thermal transfer offers more durability and media flexibility. I would test before deciding.
Not necessarily. Speed may change at higher resolutions, especially with small text or dense graphics. Check the rated speed at your required resolution.
Use your actual paper, small text, and barcodes. Check for faint edges, smudging, and missed lines. A few clean prints may not tell the whole story.
A mechanism may accept a wide roll but print over a narrower area because of margins or guides. Measure the usable media, including backing and edge gaps.
It can reveal heat buildup or inconsistent feeding that a short test may miss. Use the exact roll when possible; media dimensions can vary slightly. Easy to overlook.
Choosing a thermal printer mechanism starts with matching its print method and output quality to the job. Consider whether the application needs sharp text, fine graphics, or dependable barcode readability, then check that the mechanism supports the required media type, paper width, and print resolution. Comparing speed alongside resolution helps ensure that faster output does not compromise clarity or suitability for the intended use.
The 2 Thermal Printer Mechanism tips are to assess performance needs and plan for long-term operation. Review expected print volume, operating temperature, and other environmental conditions to judge durability. Also check how easily the mechanism can be integrated into the device, serviced, and supplied with media. Weighing maintenance requirements, expected service life, and overall ownership costs can help you choose a solution that meets practical needs without paying for capabilities you will not use.